Compost Confessions: Fix Smells, Sogginess, and Pests
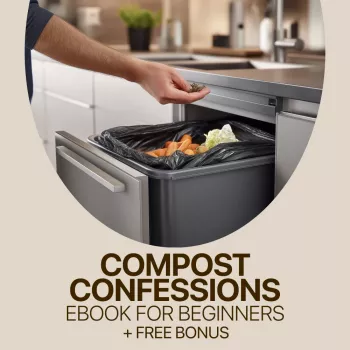
Compost Confessions: Beginner Missteps That Slow Down Great Compost
Starting a compost pile is simple; getting it to break down cleanly and consistently is where most beginners get stuck. The good news is that the most common problems—bad smells, soggy piles, stubborn scraps that never disappear, or pests—usually come from a few fixable habits. Below are the “confessions” many new composters eventually make, plus practical corrections that help turn kitchen and yard waste into dark, crumbly compost that improves soil.
Confession #1: The pile smells bad (and it’s not “earthy”)
Odor is your fastest diagnostic tool. Rotten or putrid smells usually point to a pile that’s too wet and low on oxygen. An ammonia smell points to too many nitrogen-rich inputs (greens) without enough carbon (browns) to balance them.
Fast fixes: mix in dry browns like dry leaves or shredded cardboard, then turn or fluff to add air. Avoid sealing compost under a non-breathable cover that traps moisture and turns the center anaerobic.
Prevention habits: add browns every time food scraps go in, keep a simple “dry bin” of shredded paper/leaves near the compost, and chop very wet scraps (melon rinds, pumpkin) into smaller pieces so they don’t mat into slimy layers.
Quick diagnosis: smell → likely cause → fix
| What you notice | Likely cause | What to do today |
|---|---|---|
| Ammonia smell | Too many greens (nitrogen) and not enough browns (carbon) | Add a thick layer of dry browns; mix lightly; pause adding fresh grass clippings for a few days |
| Rotten/putrid odor | Anaerobic conditions from excess moisture/compaction | Turn to aerate; add dry browns; create air channels with coarse sticks at the base |
| Sour/vinegar smell | Wet, dense layers; too many fruit scraps in one spot | Break up clumps; mix in browns; bury fruit scraps in the center |
| Smells fine but pile is slimy | Overwatering or rain exposure | Cover with a breathable lid/tarp; add browns; improve drainage under the bin |
Confession #2: Everything went in as a “green”
Greens (food scraps, fresh grass) supply nitrogen that feeds microbes. Browns (dry leaves, cardboard) supply carbon and—just as important—structure that keeps air moving. When the pile is mostly greens, it compacts and goes smelly. When it’s mostly browns, it can stall and look preserved.
An easy rule of thumb is a browns-first approach: for each bucket of kitchen scraps, add at least one bucket of dry browns (often more for very wet scraps). If you’re not measuring, make “covered completely” the standard—no fresh food visible on top.
Beginner-friendly browns: dry leaves, shredded cardboard (no glossy coating), paper egg cartons, untreated sawdust in small amounts, and straw (avoid straw that may be contaminated with persistent herbicides). Greens to treat carefully: thick grass clippings (they mat), coffee grounds (fine texture), and large amounts of citrus or onions (fine in moderation when mixed well).
Confession #3: The pile stayed wet, heavy, and lifeless
Compost moisture should feel like a wrung-out sponge: damp to the touch, not dripping. A soggy pile often comes from dumping lots of fruit/vegetable scraps at once, leaving the bin open to rain, skipping coarse bulking material, or using a container with poor drainage.
Fixes that don’t require rebuilding: add dry leaves or shredded cardboard, mix in a bulking layer (wood chips, small twigs), and turn the pile to release trapped moisture. If rain is the culprit, use a breathable cover that sheds water while still letting air in.
Placement matters too. A spot with decent drainage and a bit of shade is often ideal. Full sun can bake the surface while the center stays wet if airflow is poor, creating a misleading “looks dry, smells bad” situation.
Confession #4: “Turning” never happened (or happened too much)
Turning solves two classic beginner headaches at once: it adds oxygen and it blends wet greens with dry browns so you don’t get hidden odor pockets. If the pile smells off, looks matted, or has a hot center with dry, inactive edges, a turn is usually the right move.
Confession #5: The pile attracted pests or looked like a buffet
Confession #6: Compost was used too early (and plants didn’t love it)
A simple setup that prevents most beginner mistakes
A guided way to troubleshoot fast
Recommended resources
- Compost Confessions: Avoiding Common Beginner Mistakes (eBook)
- Wear What Works Together – Color Matching Guide for Outfits (Digital Download)
For additional composting fundamentals, see the United States Environmental Protection Agency (EPA) composting overview, the Cornell Waste Management Institute composting basics, and University of California Agriculture and Natural Resources composting guidance.
FAQ
How long does it take to make usable compost?
Many backyard piles produce usable compost in about 2–6 months with decent particle size, balanced inputs, and occasional mixing; hands-off piles often take 6–12+ months. The biggest variables are how small the materials are, moisture level, turning frequency, and how consistently browns balance out wet greens.
What’s the easiest way to keep the right greens-to-browns balance?
Use a simple habit instead of strict ratios: every time food scraps go in, cover them fully with a thick layer of dry browns. Keep a browns reserve nearby and adjust based on what you notice—add more browns when it smells strong or looks wet, and add a bit more moisture/greens if it looks dusty and unchanged.
Can compost attract rats, and how can it be prevented?
Yes, compost can attract rats when rich foods are accessible and odors are strong. Prevent it by avoiding meat/dairy/oily foods, burying scraps in the center, capping additions with browns, and using hardware cloth under bins or a lidded bin with ventilation.










Leave a comment